
Model Retouching
- evelinas99
- Dec 1, 2022
- 2 min read
Updated: Jan 25, 2023
For this exercise I attempted to retouch models' faces to get rid of any imperfections. I rarely had any problems with this exercise. I found that having higher quality images to work with is much easier for the graphic designer. I am quite happy how all of the images turned out and they did not take too much time to retouch.

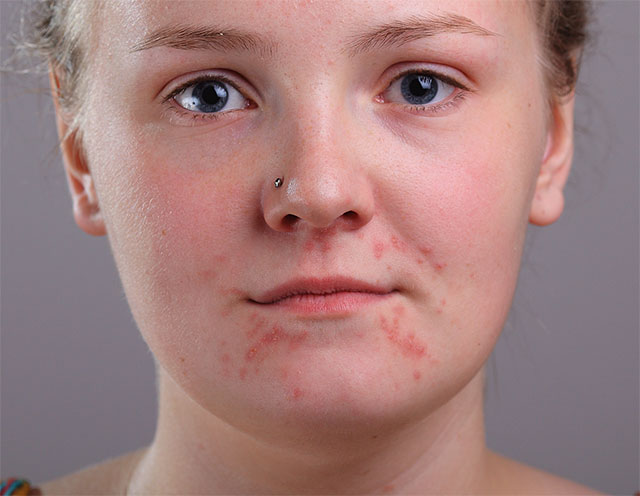

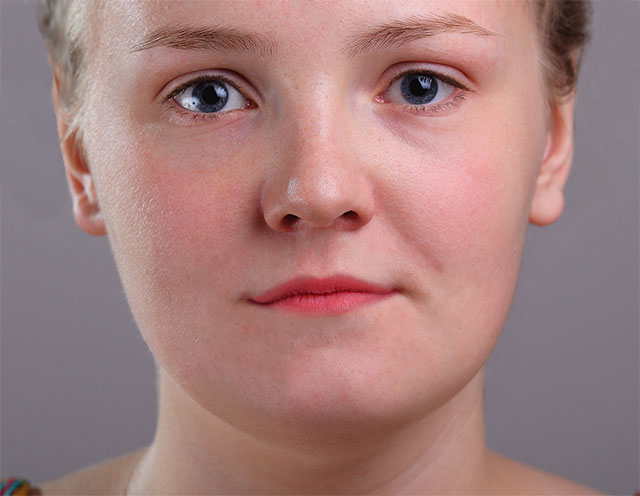
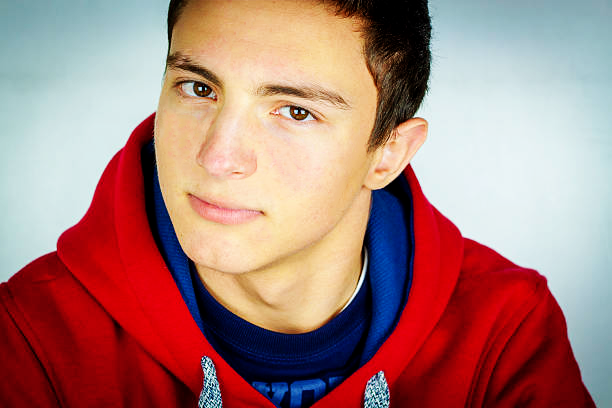
Model A. This was the first image that I worked with and did not have any issues with it. The fact that the image was higher quality definitely helped with this. Also the model's face is very up-close which also helped with noticing the imperfections and the editing process. I think I did a good job, the retouched image looks very natural. One thing I wished I have done differently is to not colour the lips. I think the colouring looks very unnatural and is quite noticeable up-close.

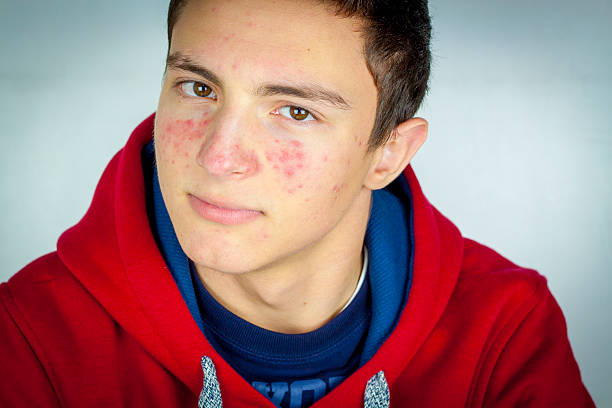

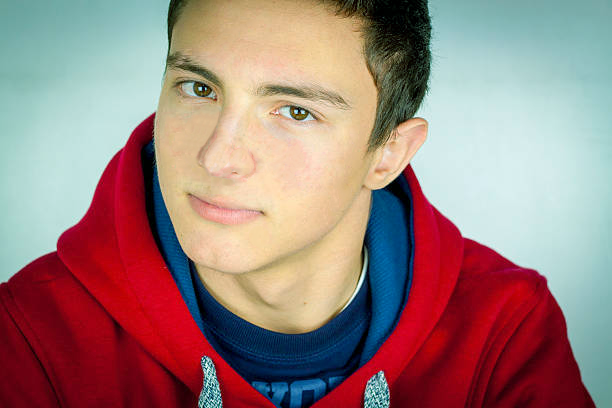

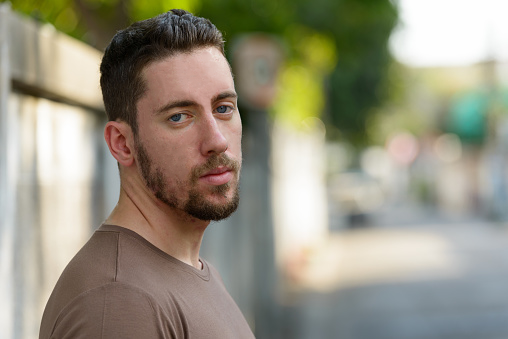
Model B. I had the most trouble with this image. Because of the low quality, the retouched areas on his face would look too smooth and noticeable. The hardest area to edit was the nose as I would struggle with getting the skin colour and the shadows right. I would use the Stamp Tool for that. Despite having done two times, I still do not think the face is edited quite right and some areas are still imperfect. Also, because the original photo has a filter on, it was difficult to duplicate it in the edited photos, and I believe I overdid it in the third photo - it looks overexposed.


Model C. In the beginning, I had some issues with this photo. It is also not the best quality. And the retouched areas would look too smooth and noticeable. First, I would edit with the Healing Tool, then I used the Stamp Tool to duplicate the skin texture and make the final result more natural looking. I am quite happy with the final result, although I still could have spent more time retouching some areas of the object, as they are still noticeably imperfect.


Model D. I did not have too much trouble with this image. There was not a lot of individual areas to edit, just to make her look more alive and healthy because the colouring in the original photo is quite bland and grey. To do this, I experimented with blending modes. Also, I erased individual strands of hair to make her look more put together. I did this using the Stamp Tool and the Healing Tool, and sometimes by using Fill for the selected areas. In the end, I selected the eras of her lips and eyes to colour them. I happy with the final image.


Model E. This was the easiest image to edit because it is very high quality and the model is very up-close. To remove the acne spots I mostly used the Spot Healing Tool. I am very satisfied with the final result, I would not change anything about it.
PSD Files


Comments